

Buying an indoor sauna is the easy part. Getting it installed correctly — safely, efficiently, and in a spot you'll actually enjoy — is what turns a boxed kit into a daily wellness habit. The good news is that most modern indoor saunas are designed for straightforward assembly, and with a bit of planning you can have yours up and running in a weekend.
This step-by-step guide walks through the whole process, from choosing the right location to your very first session. It applies to most pre-fabricated indoor saunas — traditional, infrared, and hybrid alike.
Before You Start: Planning
Good installation begins before the sauna arrives. Three things are worth settling first.
Confirm the space. Measure your intended location carefully — floor footprint, ceiling height, and clearance for the door to open. Compare those numbers against the sauna's exterior dimensions, not just the interior. Basements, spare rooms, large bathrooms, and garages are the most common indoor spots.
Check the power. Infrared saunas usually run on a standard household outlet. Traditional and hybrid saunas with electric heaters typically need a dedicated 240V circuit — which means a licensed electrician. Confirm the requirement on your model's spec sheet before anything else, because it can affect where the sauna can go. Our sauna heater buying guide covers the electrical side in more depth.
Plan for ventilation and flooring. Saunas need some airflow and a floor that tolerates heat and the occasional splash — tile, sealed concrete, or vinyl are ideal. Avoid installing directly over carpet.
Step 1: Prepare the Location
Clear the area completely and make sure the floor is level. A level base is essential — an uneven floor makes panels harder to align and can stress the joints over time. Give the walls a quick check too; the sauna doesn't need to be attached to them, but you want a flat, stable surface behind it. If you're placing the sauna against a wall, leave a small gap for airflow where the manufacturer recommends it.
Step 2: Unpack and Inventory
Open the boxes and lay out every panel, bench, and fitting. Check each piece against the parts list before you begin — it's far easier to spot a missing or damaged component now than halfway through assembly. Keep the instructions and any hardware bags organised and within reach. Most quality saunas use a clasp-together or bolt system that requires only basic tools.
Step 3: Assemble the Cabin
Assembly follows a logical order on almost every model: floor first (if included), then the wall panels, then the ceiling, and finally the door and benches.
Panels typically connect with buckle clasps or bolts. Work with a helper — panels are manageable but awkward to hold square on your own — and don't fully tighten anything until the whole shell is standing and aligned. Once everything lines up, go back and secure all the connections. Fit the benches, backrests, and any interior trim last.
Step 4: Install the Heater
This is the step that demands the most care. For an infrared sauna, the panels are usually pre-installed or simply plugged in. For a traditional or hybrid sauna, the heater is mounted according to the manufacturer's clearances — the distances from walls, benches, and the floor are specified for safety and must be followed exactly.
The electrical connection must be made by a licensed electrician. This isn't a place to improvise: a sauna heater draws significant power and runs hot for long periods. A professional will wire the dedicated circuit, connect the heater, and confirm everything meets code. Explore heater options in the sauna heaters collection, including Harvia and HUUM models.
Step 5: Add the Stones and Accessories
If your sauna is traditional or hybrid, arrange the sauna stones in the heater according to the instructions — loosely, so air can circulate between them, never packed tight. Then add the finishing touches: a bucket and ladle for steam, a thermometer, a sand timer, and a backrest for comfort. The sauna accessories collection has everything you need, and our guide to the best sauna accessories covers what to prioritise.
Step 6: First Heat and Cure
Before your first proper session, most saunas need an initial "cure" or burn-in run. Heat the empty sauna to a high temperature for the period the manufacturer specifies — often 30–60 minutes — with good ventilation. This burns off any manufacturing residue and prepares the heater and stones. Don't skip it; it also lets you confirm everything is working before you commit to a full session.
Three Indoor Saunas That Are Easy to Install
Here are three indoor-friendly models that assemble cleanly at home. Each links through to full specifications.
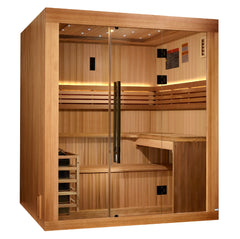
Golden Designs "Osla" Indoor Traditional Sauna — 6 Person
A clasp-together Canadian Red Cedar cabin with a Harvia stove and built-in controls, designed for straightforward indoor assembly. Roomy six-person capacity makes it a genuine home-spa centerpiece once installed.
If you want gentle heat and the simplest possible install, an infrared cabin is the easiest starting point.
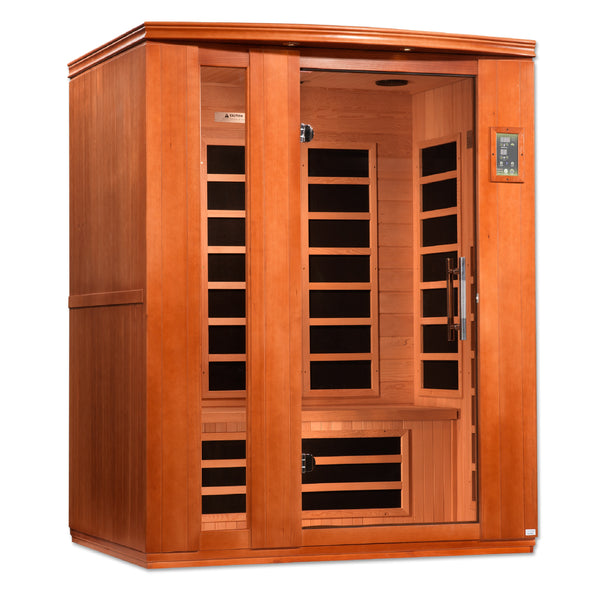
Dynamic "Lugano" Low EMF Infrared Indoor Sauna — 3 Person
An infrared cabin that runs on standard household power, so there's no 240V circuit to install. Clasp-together assembly, natural hemlock construction, and low-EMF panels make it the most beginner-friendly indoor option here.
Want both heat types in one indoor cabin? A hybrid installs much like a traditional model.
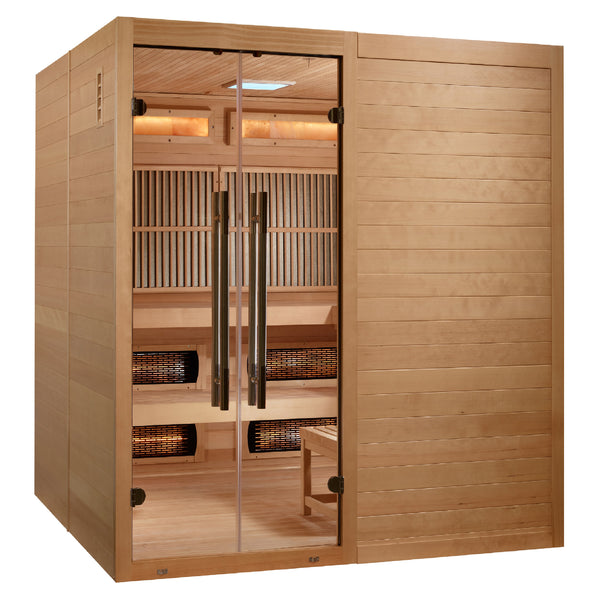
Golden Designs "Toledo" Indoor Hybrid Sauna — 6 Person
Combines full-spectrum infrared with a traditional Harvia stove in one indoor cabin, so you get both heat styles. Installs like a traditional sauna — plan for the 240V circuit — and rewards the effort with maximum flexibility.
Common Installation Mistakes to Avoid
A few errors come up again and again. Skipping the level-floor check leads to misaligned panels. Over-tightening connections before the shell is aligned makes the whole thing harder to square. Undersizing or DIY-ing the electrical is both a code violation and a safety risk. And packing the stones too tightly restricts airflow and hurts performance. Take your time on each, and the finished sauna will look and run far better.
Frequently Asked Questions
How long does it take to install an indoor sauna?
Most pre-fabricated indoor saunas take a few hours to a full day to assemble with two people. The electrical work is separate and handled by your electrician, usually in a couple of hours.
Do I need an electrician to install a home sauna?
For traditional and hybrid saunas with electric heaters, yes — the dedicated 240V circuit must be wired by a licensed electrician. Many infrared saunas run on a standard outlet and don't require one.
Can I install an indoor sauna myself?
The cabin assembly is designed for DIY with a helper and basic tools. The electrical connection is the part to leave to a professional.
What kind of flooring do I need under an indoor sauna?
A level, heat-tolerant, water-resistant surface such as tile, sealed concrete, or vinyl. Avoid installing directly over carpet.
The Bottom Line
Installing an indoor sauna comes down to planning the space, assembling the cabin carefully, and bringing in a licensed electrician for the heater. Follow the steps in order, respect the heater clearances, and don't skip the first cure run, and you'll have a safe, efficient sauna ready for years of use. Browse installation-friendly options in the indoor sauna collection, or explore the full saunas range to find your fit.